![](https://techkoya.com/wp/wp-content/uploads/2022/02/ハムスター-150x150.png)
前回、リフレッシュパソコンについて色々と教えてもらい、興味深々。
![](https://techkoya.com/wp/wp-content/uploads/2022/02/fukidashi_sensei1-150x150.png)
それは良かった!
![](https://techkoya.com/wp/wp-content/uploads/2022/02/fukidashi_sensei1-150x150.png)
前回をご覧になっていない方はこちらをクリックしてみて下さい♪
![](https://techkoya.com/wp/wp-content/uploads/2022/02/ハムスター-150x150.png)
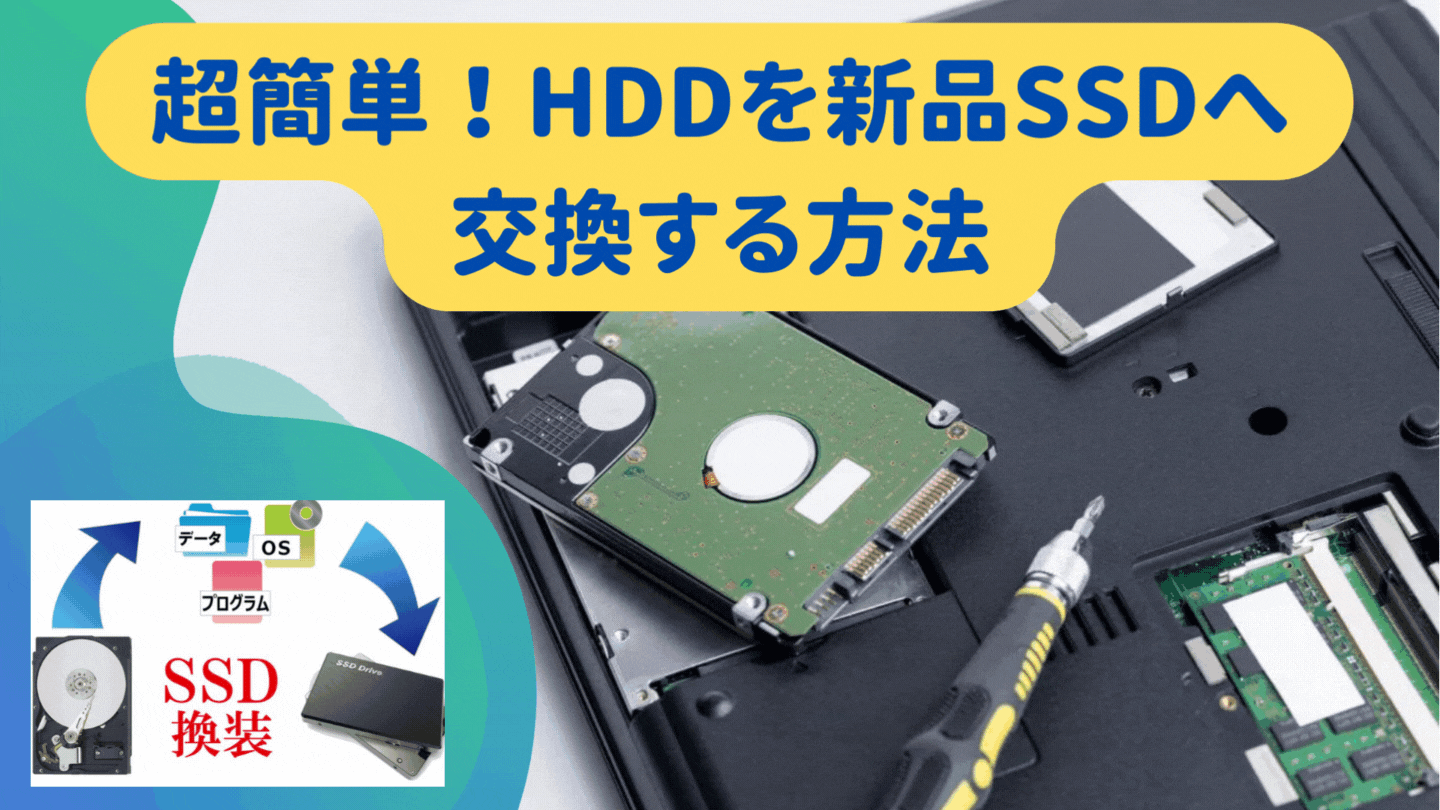
でも自分で古くなったHDDを新品のSSDに交換できるって本当?
![](https://techkoya.com/wp/wp-content/uploads/2022/02/fukidashi_sensei1-150x150.png)
出来ますよ!
![](https://techkoya.com/wp/wp-content/uploads/2022/02/fukidashi_sensei1-150x150.png)
では、実際にやってみましょー!
![](https://techkoya.com/wp/wp-content/uploads/2022/09/0-1-1024x768.jpg)
![](https://techkoya.com/wp/wp-content/uploads/2022/09/IMG_6975-1024x521.jpg)
作業前の注意点
- 念の為、データのバックアップは事前にしておきましょう。
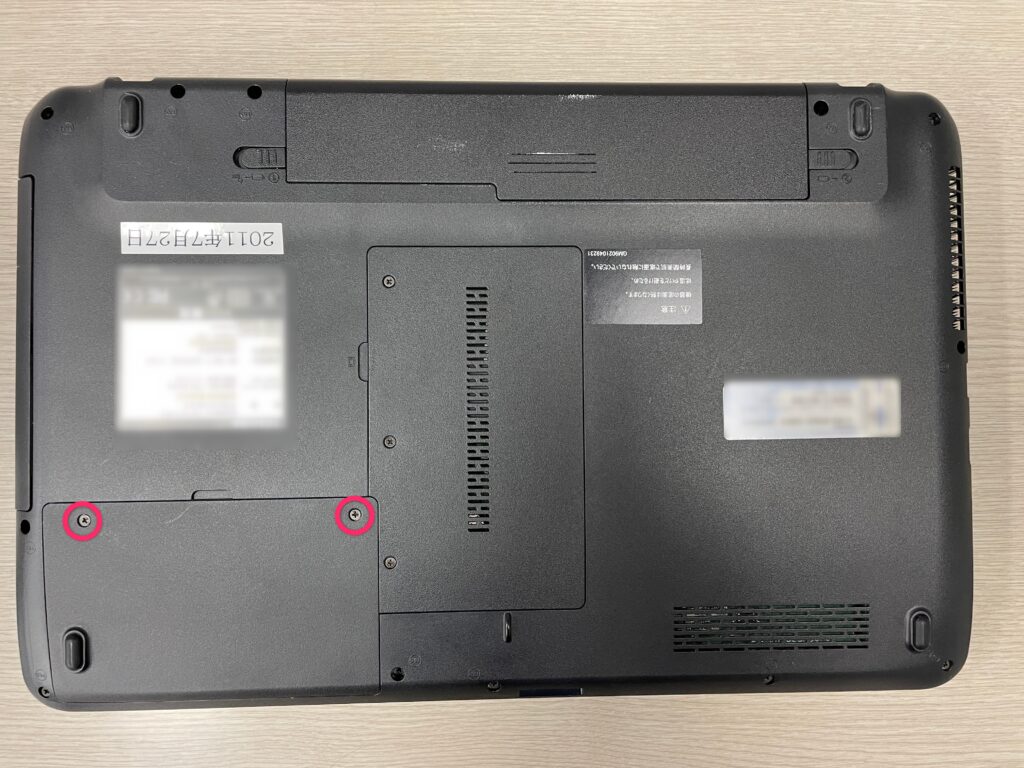
- 作業をする前には電源コード(ACアダプター)とバッテリーを必ず外しておいてください。
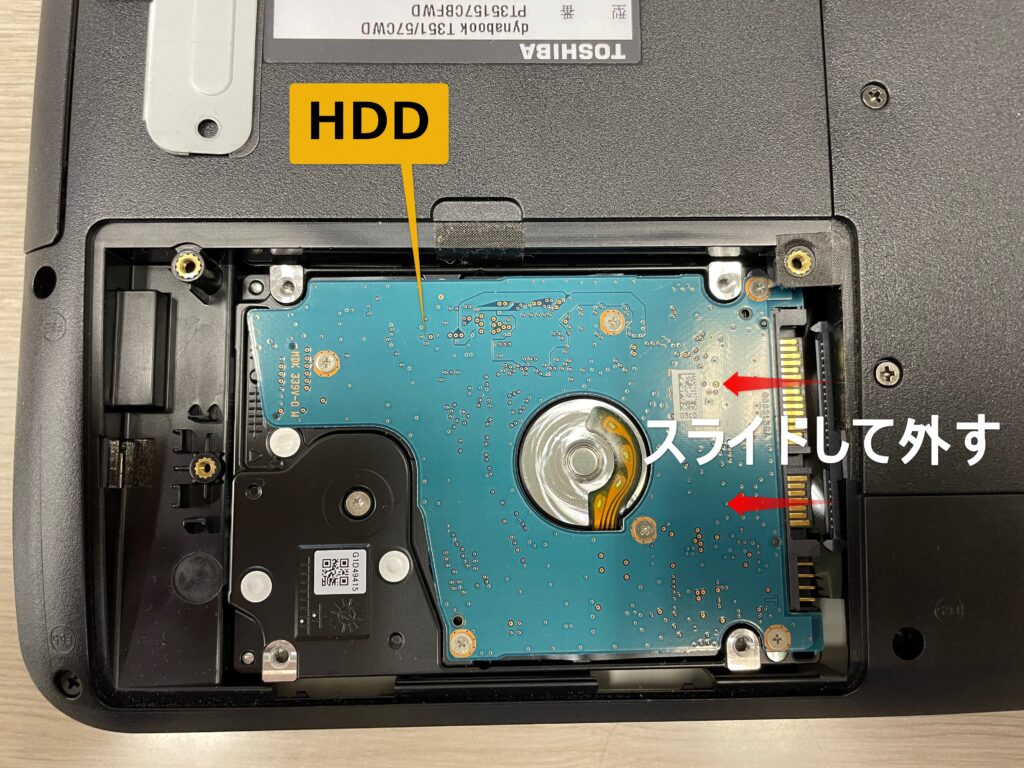
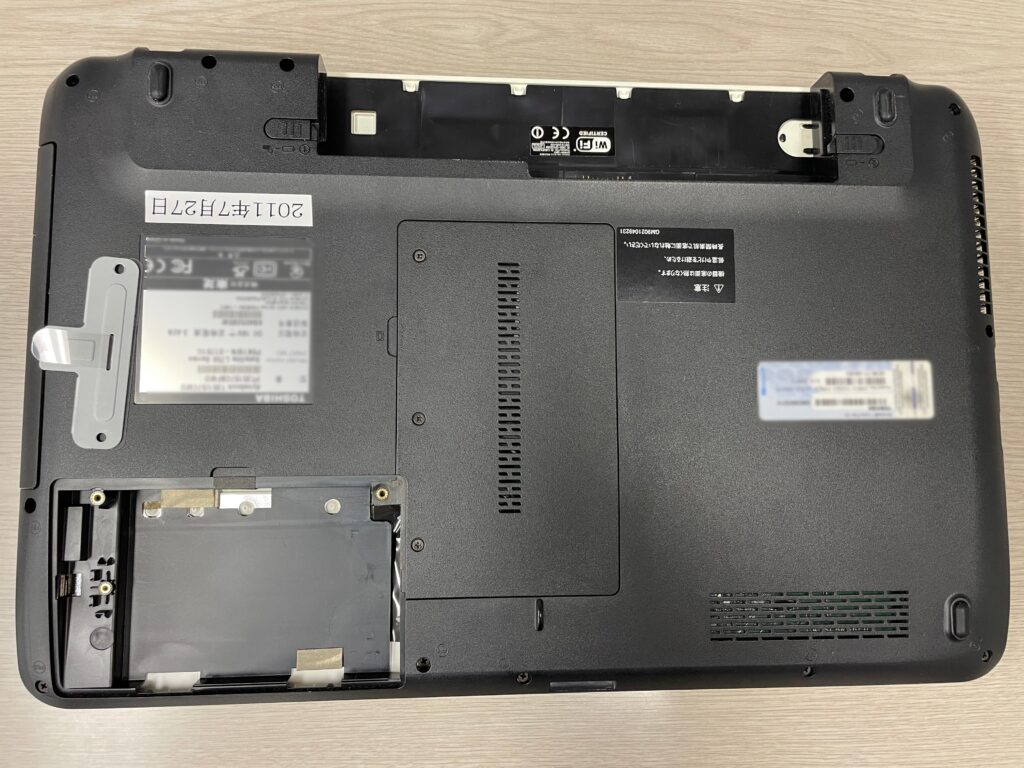
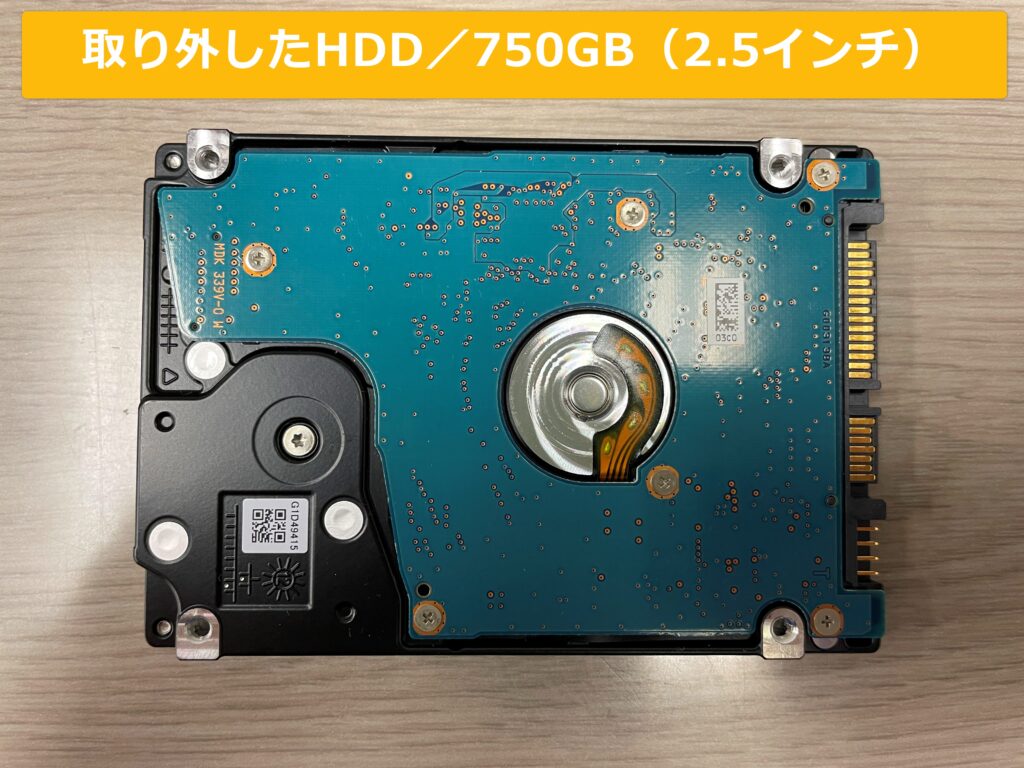
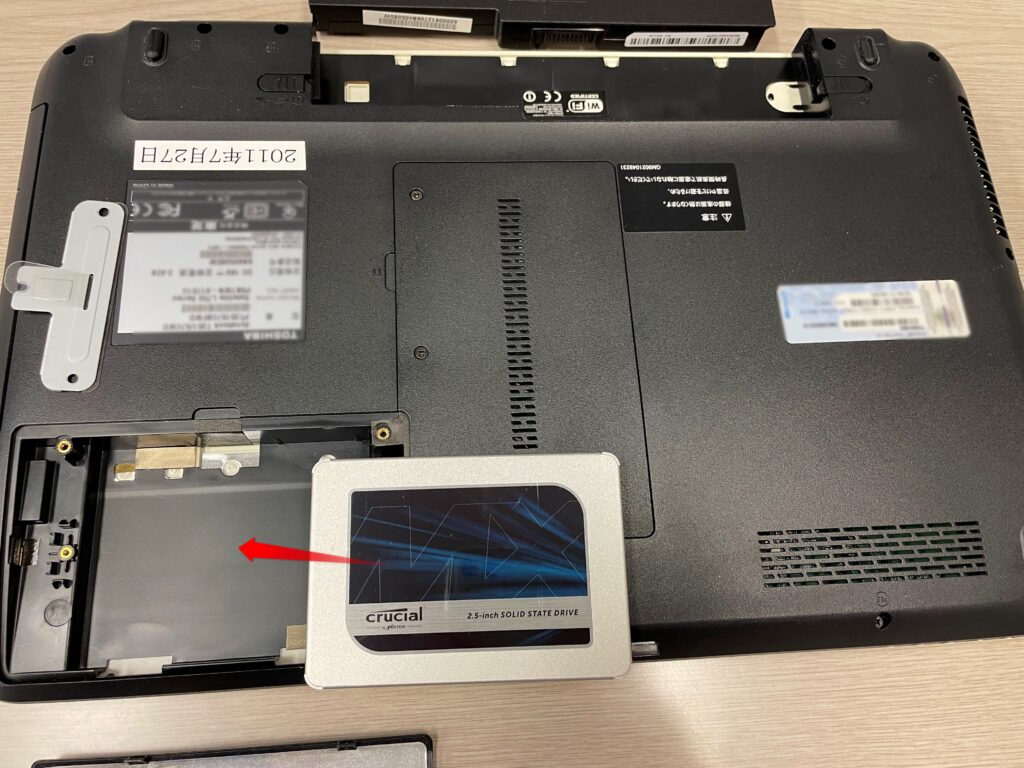
![](https://techkoya.com/wp/wp-content/uploads/2022/09/1-2-1024x768.jpg)
HDDを取り出そう!
![](https://techkoya.com/wp/wp-content/uploads/2022/09/2-1024x768.jpg)
![](https://techkoya.com/wp/wp-content/uploads/2022/09/3-1024x798.jpg)
![](https://techkoya.com/wp/wp-content/uploads/2022/09/4.1-1024x768.jpg)
![](https://techkoya.com/wp/wp-content/uploads/2022/09/4-1-1024x768.jpg)
![](https://techkoya.com/wp/wp-content/uploads/2022/09/5-1-1024x768.jpg)
HDD→SSDにデータをまるごと移行(クローン/コピー)しよう
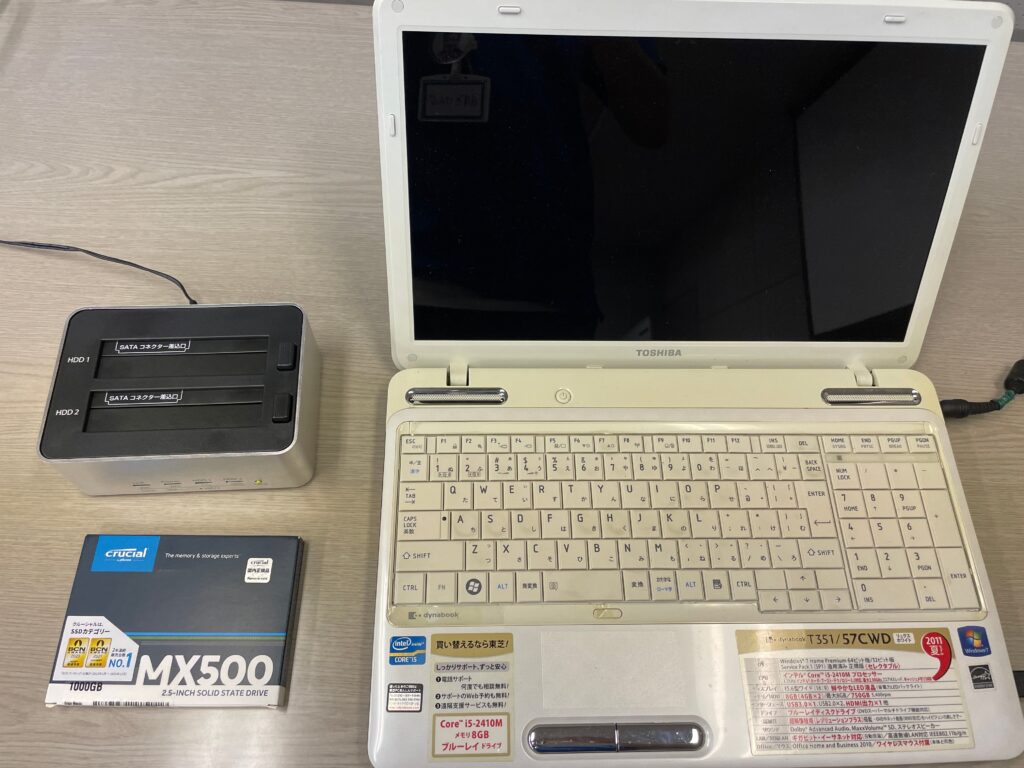
データを移行する場合、HDDの容量〔今回は750GB〕よりも大きい容量のSSD〔今回は1TB(1000GB)〕を選んで下さい。
![](https://techkoya.com/wp/wp-content/uploads/2022/09/6-1-1024x768.jpg)
![](https://techkoya.com/wp/wp-content/uploads/2022/09/7-1024x768.jpg)
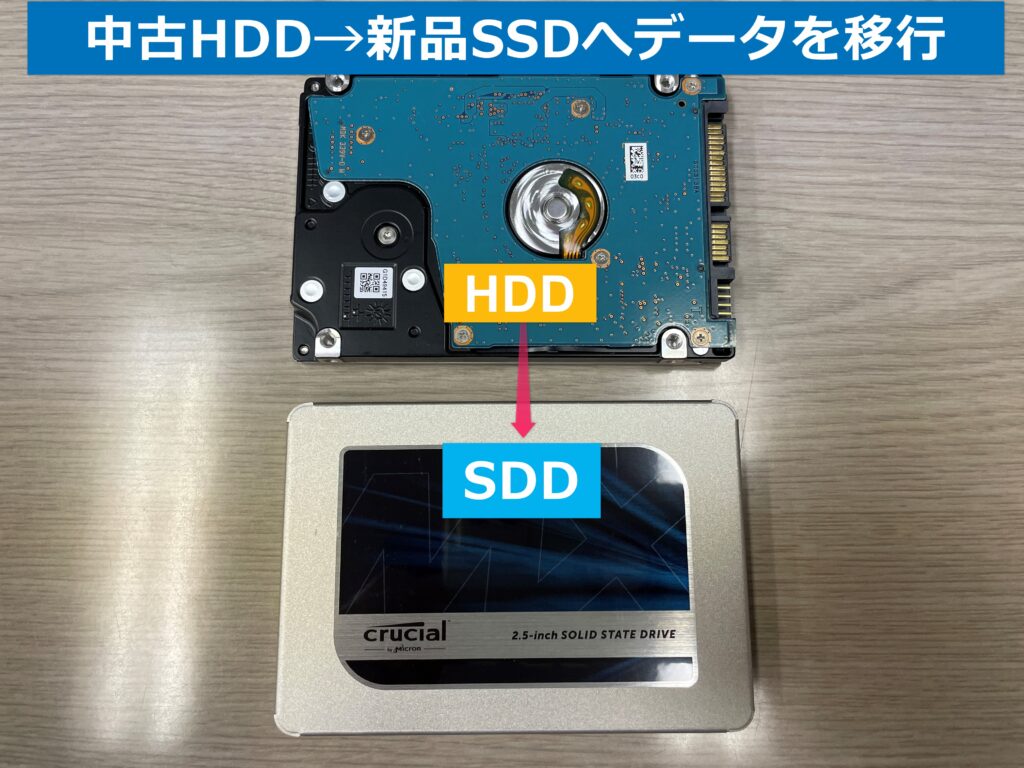
今回、データ移行は下記のキットを使用しました。
![](https://techkoya.com/wp/wp-content/uploads/2022/09/8.jpg)
![](https://techkoya.com/wp/wp-content/uploads/2022/09/9.jpg)
![](https://techkoya.com/wp/wp-content/uploads/2022/09/スクリーンショット-2022-09-11-130303.png)
![](https://techkoya.com/wp/wp-content/uploads/2022/09/10-1-1024x768.jpg)
![](https://techkoya.com/wp/wp-content/uploads/2022/09/11-1-1024x768.jpg)
![](https://techkoya.com/wp/wp-content/uploads/2022/09/12-1-1024x768.jpg)
![](https://techkoya.com/wp/wp-content/uploads/2022/09/13-2-1024x768.jpg)
![](https://techkoya.com/wp/wp-content/uploads/2022/09/14-2-1024x768.jpg)
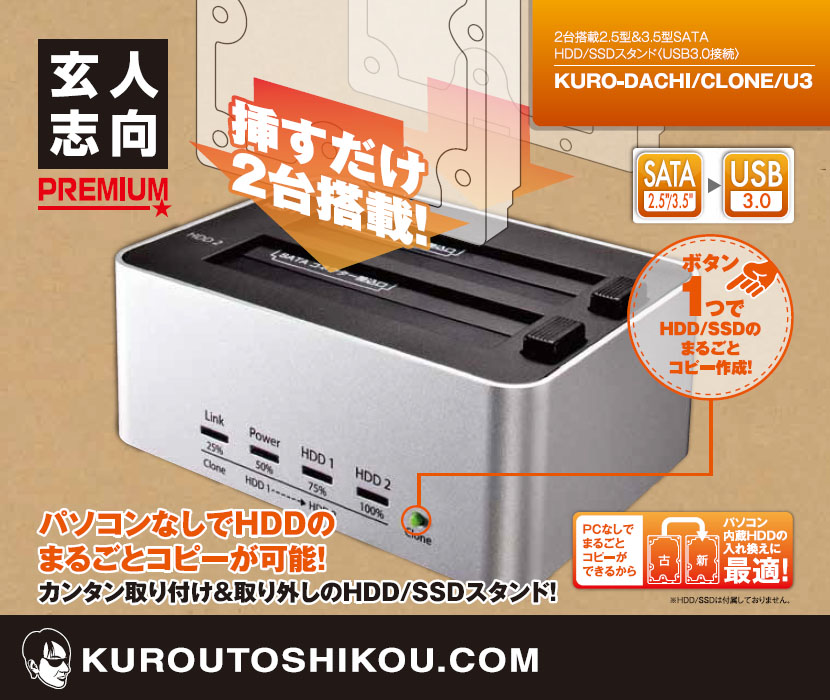
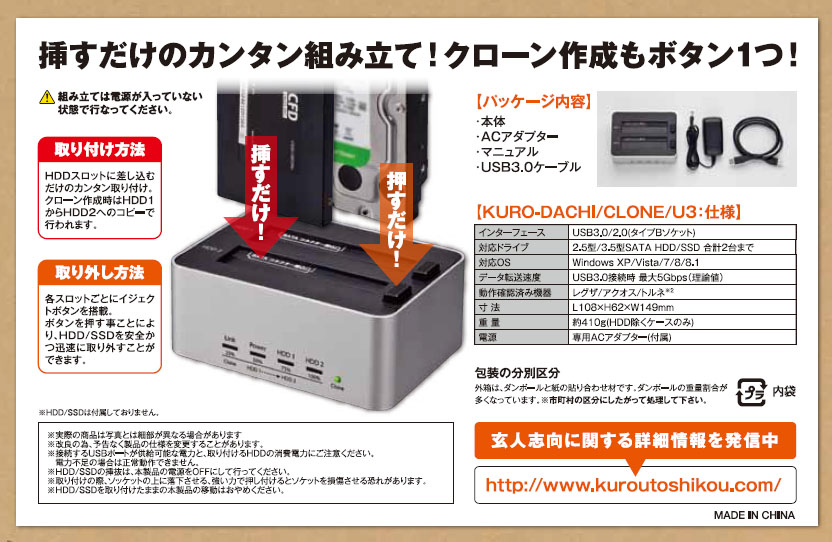
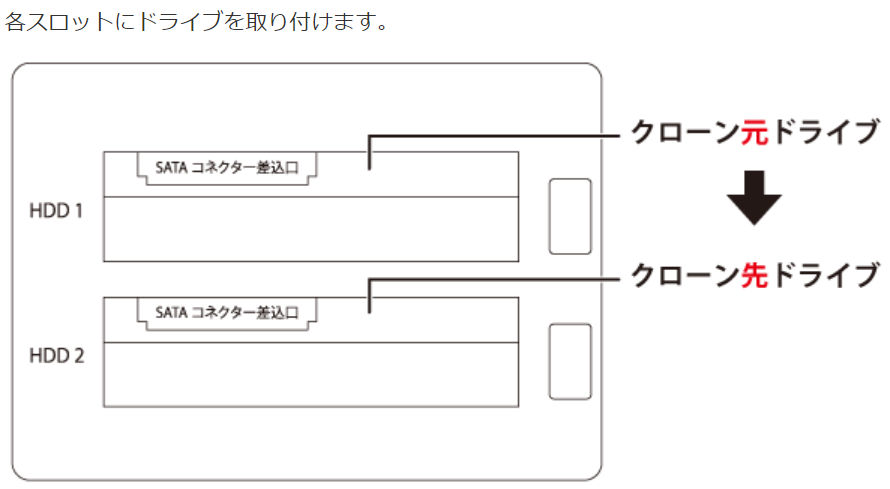
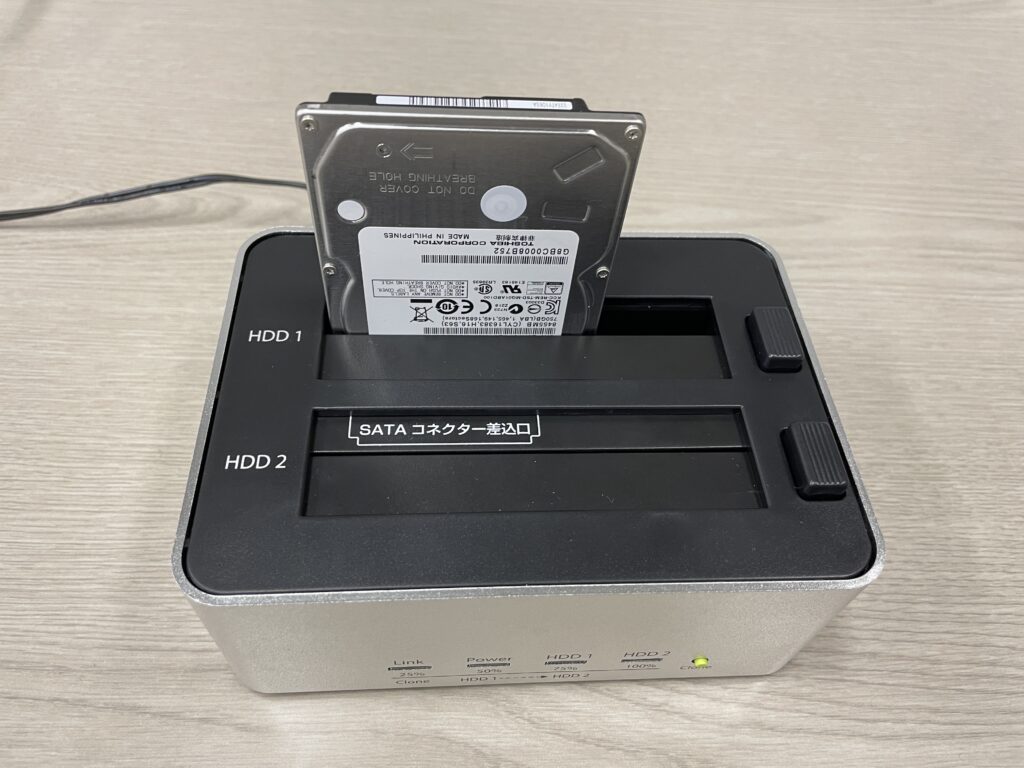
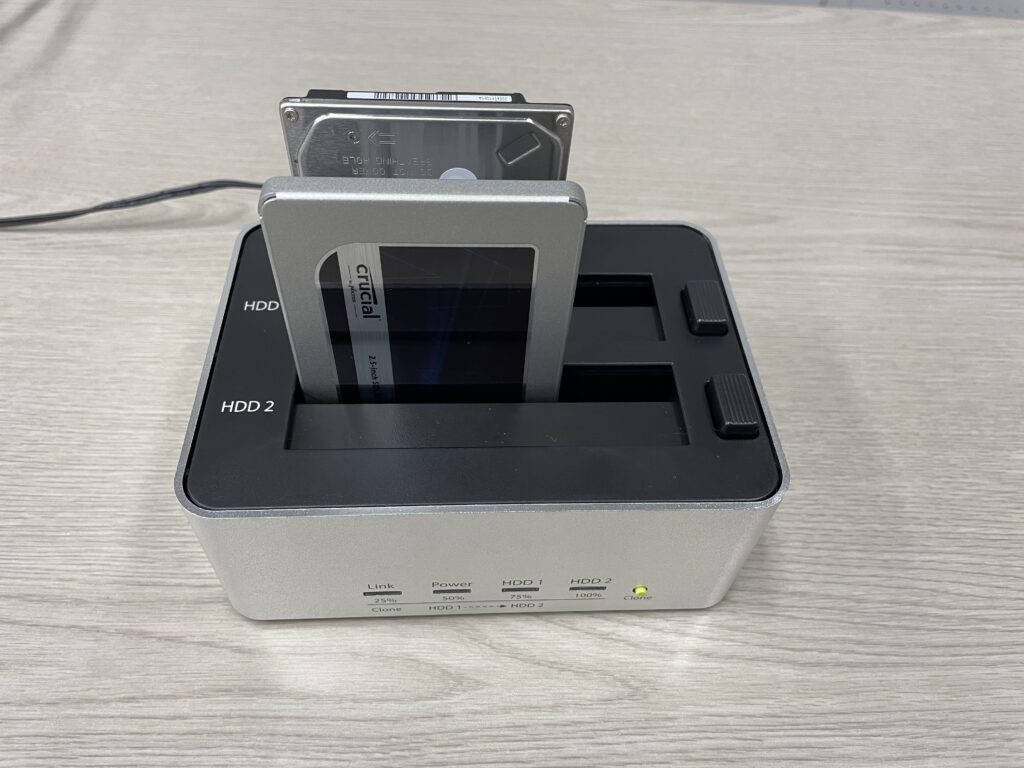
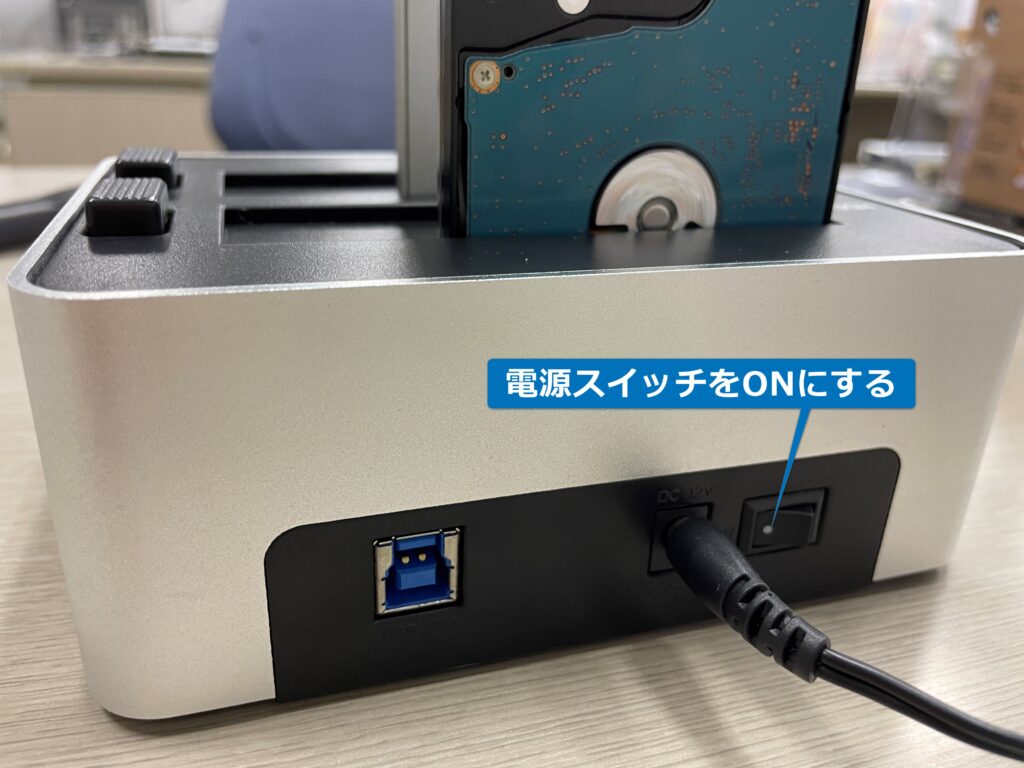
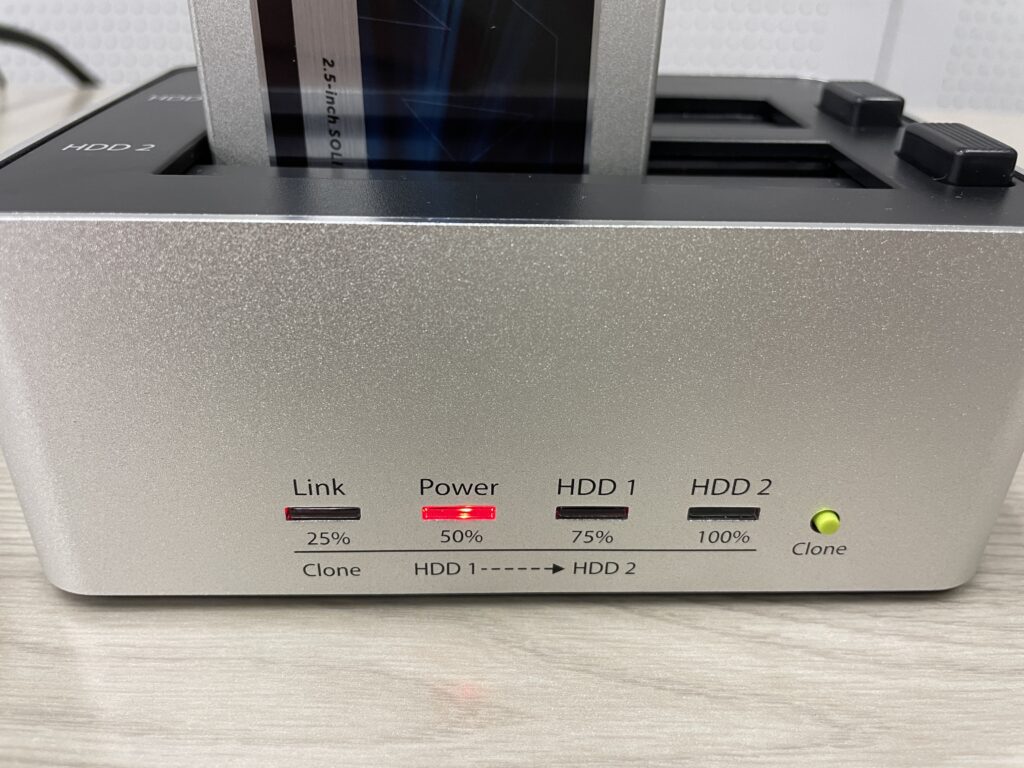
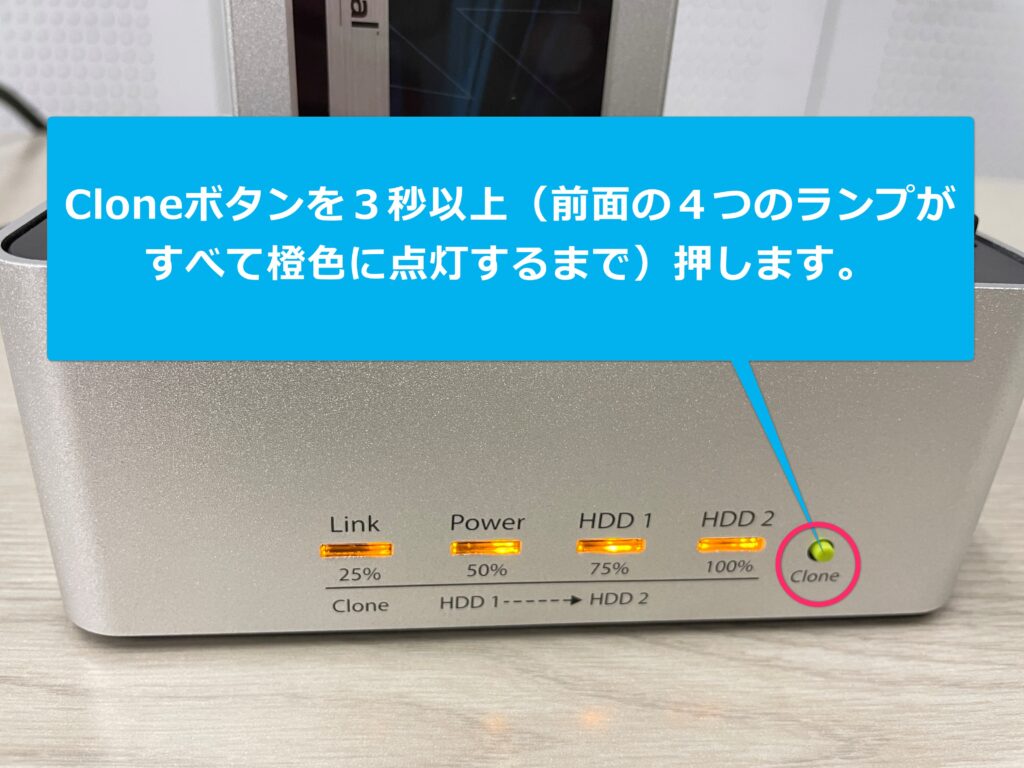
これで自動的にデータの移行(コピー)が開始されます。
![](https://techkoya.com/wp/wp-content/uploads/2022/09/20_1.png)
![](https://techkoya.com/wp/wp-content/uploads/2022/09/25-1024x768.jpg)
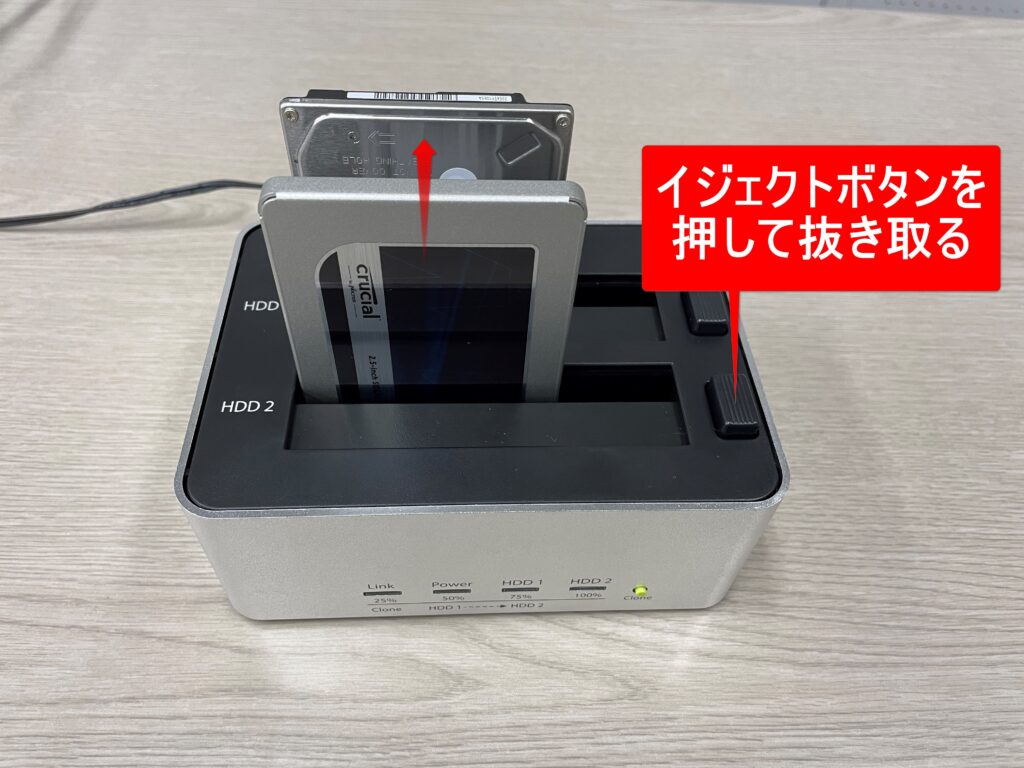
移行(コピー)したSSDを取り付けよう!
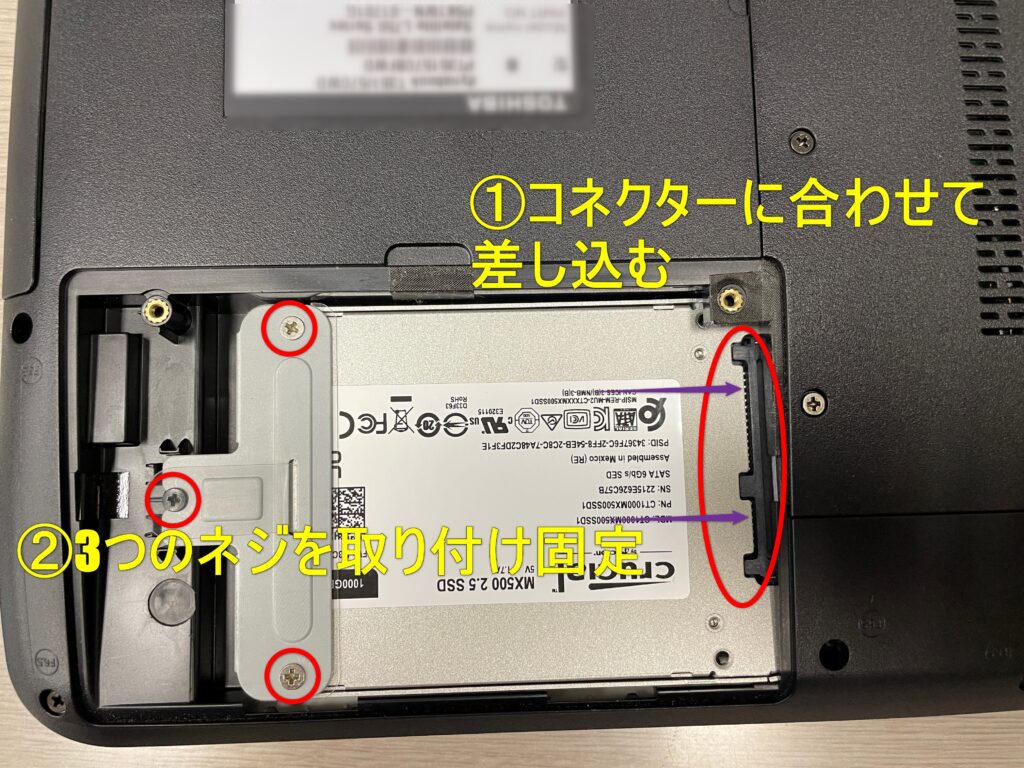
![](https://techkoya.com/wp/wp-content/uploads/2022/09/26-1-1024x768.jpg)
![](https://techkoya.com/wp/wp-content/uploads/2022/09/27-1-1024x768.jpg)
![](https://techkoya.com/wp/wp-content/uploads/2022/09/33-1024x768.jpg)
![](https://techkoya.com/wp/wp-content/uploads/2022/02/fukidashi_sensei1-150x150.png)
いかがですか?
![](https://techkoya.com/wp/wp-content/uploads/2022/02/fukidashi_sensei1-150x150.png)
たったこれだけです。
![](https://techkoya.com/wp/wp-content/uploads/2022/02/ハムスター-150x150.png)
超簡単!!!
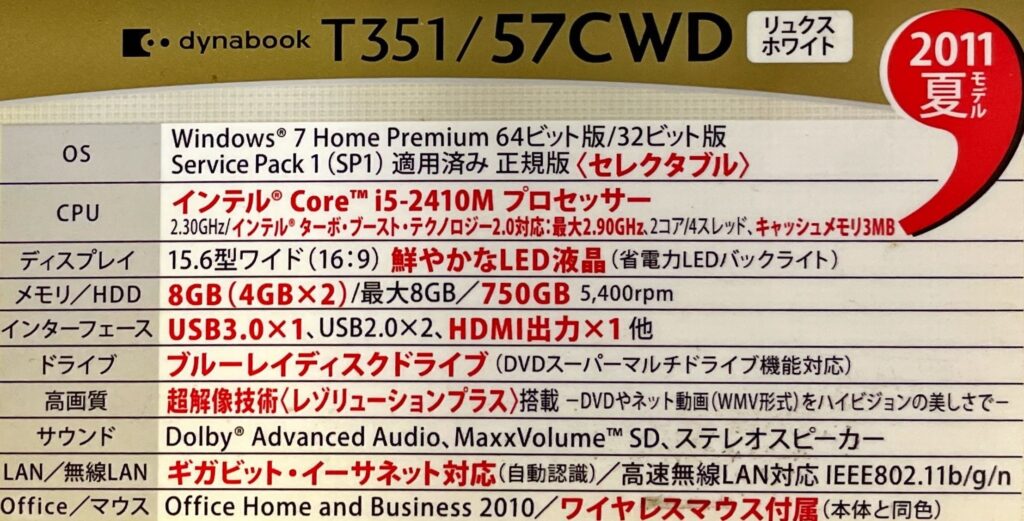
パソコンによってHDDの格納場所は異なります。
また、裏面全体を外さないと取り出せないものもありますので注意しましょう。
HDDの容量やデータ量によってデータの移行時間(おおよそ1時間~3時間程度)は異なります。
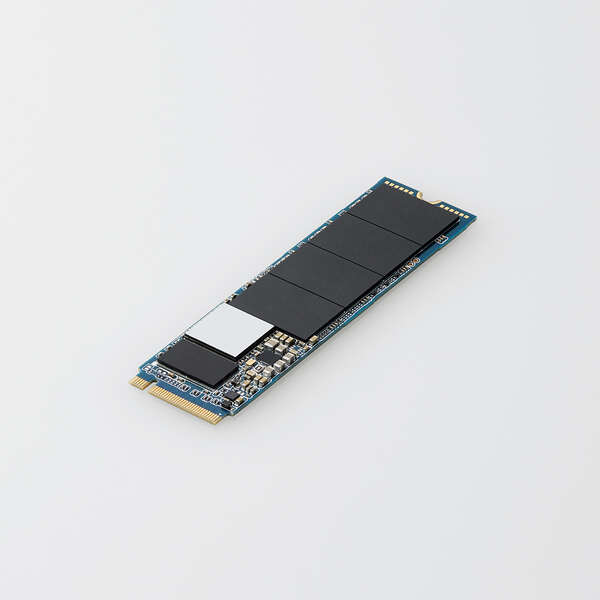
SSDの種類
SSDのサイズ(フォームファクタ)の種類
1.8インチ(Micro SATA)/ 2.5インチ(Serial ATA)/ mSATA / M.2 の4つに分けられます。
SSDの接続規格
・SATA(Serial ATA)
HDDでも使用されていた接続規格。2.5インチ
・PCI-e(Peripheral Component Interconnect Express)
おもにM.2 SSDで採用
現在は以下の2つのSSDが主流となっています。
![](https://techkoya.com/wp/wp-content/uploads/2022/09/ESD-IB0240G_01.jpg)
![](https://techkoya.com/wp/wp-content/uploads/2022/09/ESD-IM20256G_01.jpg)
![](https://techkoya.com/wp/wp-content/uploads/2022/02/fukidashi_sensei1-150x150.png)
いかがでしたか?
![](https://techkoya.com/wp/wp-content/uploads/2022/02/fukidashi_sensei1-150x150.png)
難しいと思いきや意外と簡単ですよね!
![](https://techkoya.com/wp/wp-content/uploads/2022/02/fukidashi_sensei1-150x150.png)
但しパソコンの種類によっては複雑な構造のタイプもありますので
心配の方は専門の会社に依頼するのも良いかもしれませんね♪
質問などあれば気軽に書き込んでくださいね♪